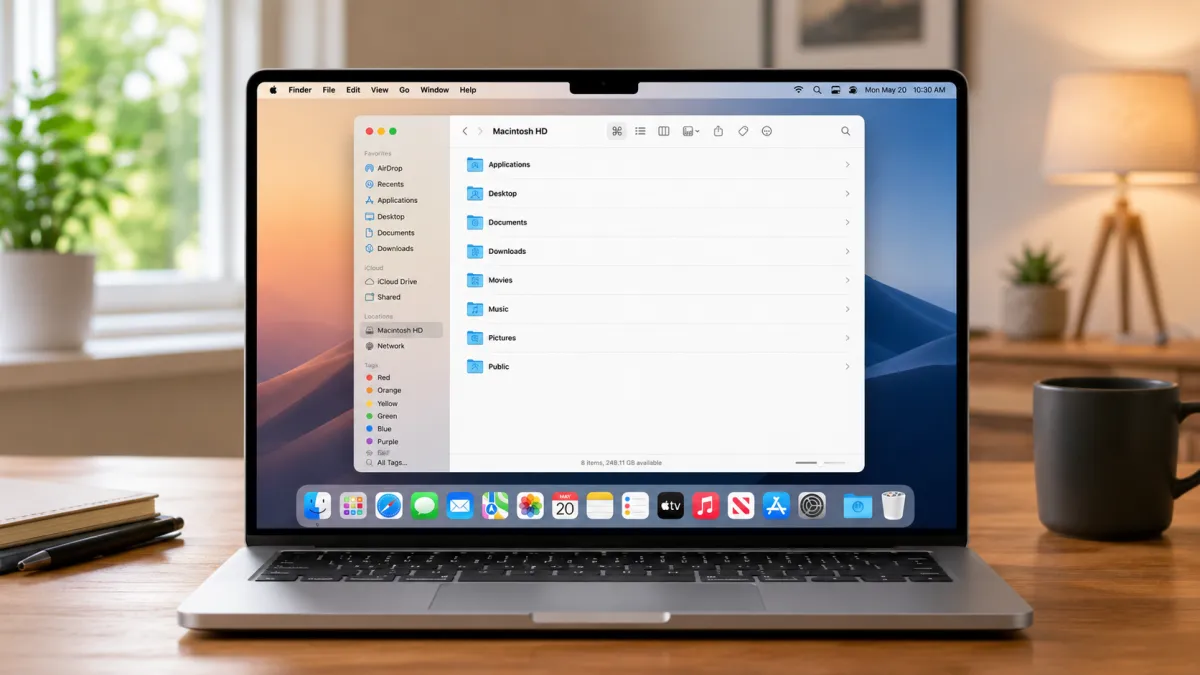
The Finder sidebar is one of the handiest parts of macOS. It provides quick access to commonly used folders, drives, cloud locations, tags, and other destinations. However, if too many items are displayed, the sidebar can become cluttered and harder to navigate.
Fortunately, macOS lets you personalize the sidebar according to your workflow. You can choose which locations appear, add shortcuts to frequently used folders, remove entries you rarely need, and rearrange items for easier access.
Also read: How to Enable Battery Percentage on Android: See Your Exact Battery Level Anytime
Why Customize the Finder Sidebar?
A personalized sidebar can make everyday file management faster and more convenient.
You can use it to:
- Keep frequently used folders within easy reach.
- Remove locations you rarely access.
- Add shortcuts for projects and work folders.
- Organize shortcuts in a preferred order.
- Control which Finder sections are visible.
- Hide the sidebar temporarily when you need more workspace.
Change Finder Sidebar Items
The easiest way to control what appears in the sidebar is through Finder’s settings.
Open Finder Settings
First, launch Finder from the Dock.
With Finder active, click Finder in the macOS menu bar and select Settings. Then open the Sidebar tab.
You’ll find different categories containing locations that can be displayed in the sidebar, including Favorites, iCloud, Locations, and Tags.
Choose What Appears
Review the available options and select the ones you actually use.
For instance, you may want quick access to Documents, Downloads, connected drives, or iCloud Drive. If a location isn’t useful to you, clear its checkbox.
You can change these selections whenever your workflow changes.
Hide the Finder Sidebar Temporarily
You don’t always need the sidebar visible. If you want more room to view files and folders, macOS lets you hide it without removing any shortcuts.
Open a Finder window and select View from the menu bar. Then click Hide Sidebar.
The sidebar will disappear, giving the main file area additional space.
To restore it, go back to View and select Show Sidebar.
Add Folders to Finder Favorites
If there’s a folder you access frequently, adding it to Favorites can save time.
Simply drag the folder into the Favorites area of the Finder sidebar and release it in the position you prefer.
This works well for folders containing:
- Work documents
- Current projects
- Personal files
- Frequently accessed downloads
- Important resources
The shortcut gives you quick access without requiring you to navigate through multiple folders each time.
Add a File or App Shortcut
You can also place shortcuts to certain individual files or applications in Finder’s sidebar.
When dragging an item toward the Favorites section, hold the Command (⌘) key while dropping it there. This creates a shortcut rather than relocating the original item.
The actual file or application remains in its original location.
Remove Unwanted Sidebar Entries
If your sidebar has become crowded, removing unused shortcuts can make it much easier to navigate.
To remove a shortcut, drag it away from the sidebar until the removal indicator appears, then release it.
Don’t worry about losing the original file or folder. Removing an item from Favorites only removes its sidebar shortcut; it does not delete the original item from your Mac.
Rearrange Your Shortcuts
Finder doesn’t require you to keep sidebar items in their default arrangement.
You can drag shortcuts up or down to change their position. Consider placing the folders and locations you use most often near the top so they are easier to reach.
A little rearranging can make a noticeable difference if you regularly work with several folders.
Adjust the Sidebar Width
Sometimes the problem isn’t the number of shortcuts but the available space.
If folder names are being shortened or are difficult to read, place your pointer over the divider between the sidebar and the main Finder window. Drag the divider left or right until you get the desired width.
A wider sidebar makes long names easier to see, while a narrower sidebar provides more room for displaying files.
Manage Finder Tags
Tags can also be controlled from Finder’s settings.
Open Finder Settings and select the Tags section. From there, you can choose which tags should be displayed in the sidebar.
If you don’t use certain tags, removing them can help keep the interface cleaner.
Some Finder sections can also be collapsed when you don’t need to view their contents. This is another simple way to reduce visual clutter.
Use Other Finder Features
Customizing the sidebar is just one way to make Finder easier to use.
macOS also gives you several ways to change how files are displayed. Depending on your preference, you can switch between:
- Icon view
- List view
- Column view
- Gallery view
Finder’s search tools can help locate files quickly, while features such as file renaming, tagging, and sharing can make everyday file management more efficient.
Final Thoughts
The Finder sidebar doesn’t have to contain every available location. Setting it up around the folders, drives, and shortcuts you actually use can make navigating your Mac much quicker.
Take a few minutes to remove unnecessary entries, add your most-used folders, and arrange the shortcuts in a useful order. Once customized, the Finder sidebar can become a much cleaner and more practical part of your everyday Mac workflow.

I am a passionate Tech Writer with strong industry experience. I enjoy exploring the latest technological innovations and sharing clear, helpful insights with my audience.